WEAVER
Well-known Member
Cavy Slave
- Joined
- Dec 29, 2005
- Posts
- 1,771
- Joined
- Dec 29, 2005
- Messages
- 1,771
So many times ramps and second levels confuse people, and can feel so overwhelming that they do not even want to try to attempt to build one. I want to change that for everyone and help you build on to your pigs' existing cage in a safe and in my opinion most effective way. Many times while looking through the gallery of pictures I can't help but think the ramp is just to steep, or unstable, and sometimes I don't even understand how they are staying up. I think the pigs have the same feeling and that is why so many pigs don't care to use them. I have nine pigs and I think their favorite "toy" is the ramp. All of my pigs learned how to successfully use a ramp within a 24 hour time period, and I really think yours could as well.
Before I get into the proper building technique, I want to share with you the benefits of having a ramp. A ramp allows your pigs access to have a bigger cage when you can not give them anymore cage room on the floor area, that is first and foremost. It is great excersize and so fun to watch them after they master the "expressway". It allows your cage to remain cleaner longer if you use your upstairs as a kitchen area and is easy to feed and water them seeing it is at the very top of the cage. Another reason I love having a ramp and second level is it allows your pigs space, room to just get away from one another and spread everything out, therefore relieving stress and in my opinion the pigs tend to get less snippy with one another. As you can clearly see, there are so many positives ---the only negative---you have to put it together
Onto the building aspect . . .step one and very important when you add a second level of any kind to your cage, no matter the size please use cable ties and the connectors to make your cage as stable as possible. Once you have your floorplan built to you liking here is how you build your ramp to allow as much floor room as possible and have it very stable.
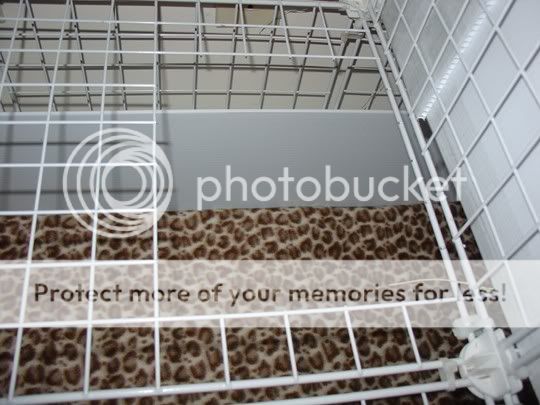
Using wirecutters you want to cut a fairly large hole to allow pigs to pass and come through the opening of the floor with ease. I prefer to cut 5 grids across by 7 grids down. Make sure you cut them totally off and even so your pet does not have get injured from the sharp edges. Than file down the edges til smooth. This is what the opening for the ramp should look like . . .
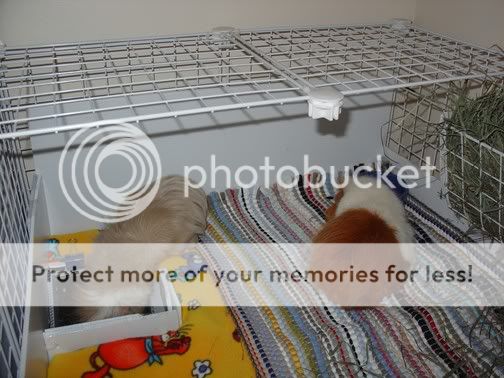
Now that you have the opening complete you need to cut the coroplast to fit. This is the biggest challenge, but quite easy if you take the time to measure. It is easiest if you lay on your back and get under the second floor of the cage. Taking a ,mark off from the bottom the part of the coroplast that is covering your hole. You want to score the corplast down the middle, using the part you are cutting to make a edge on the front side of the opening of the ramp so you pigs knows to use the backside. Once you have that cut and scored you will fold it back to two sides of the ramp opening and secure it with packing tape. This is what the opening now will look like . . .

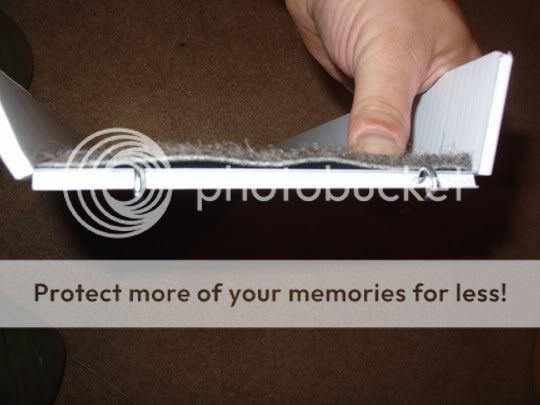
The next step is making your actual ramp. You are going to need a piece of 6mm coroplast with the lines of the coroplast facing across, not down the length of the ramp.This piece you are going to want to cut 21 inches long, 9 inches across. Once you have that cut out you are than going to score the piece 1 1/2 in on each of the sides to make the side walls of the ramp so your pigs stay safe from falling off. Than just angle cut all four corners of the ramp so there is a smooth edge like shown so your pig does not get injured from any sharp corners.
The next step is adding the eyelet screws. You are going to need two eyelet screws and you simply push them through the coroplast, one on each side with the hooks facing downward so they can clip onto the grid. It should look like this . . .
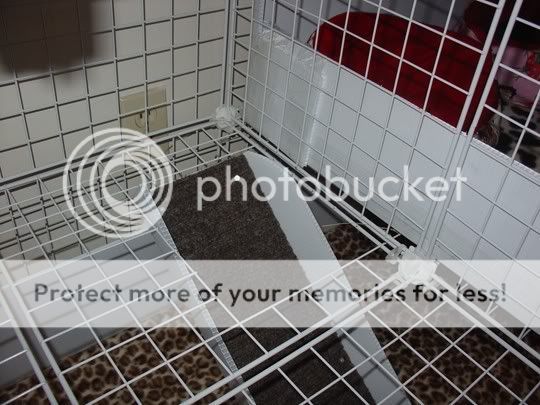
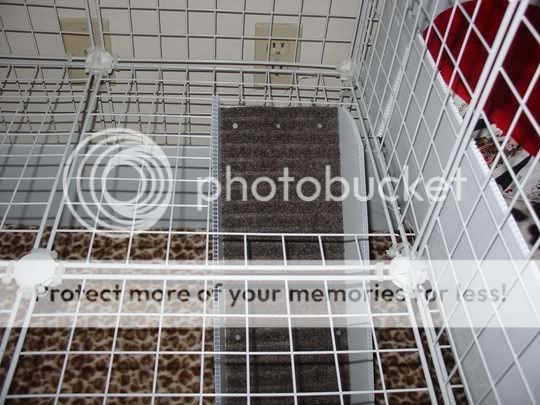
I prefer to use outdoor rug and cut it to fit the down part of the ramp (not the sides) and attach that to the ramp so your pig does not slide on the coroplast. Once the rug is attached you can than clip your ramp onto the grid opening and it should look like this . . .
Before I get into the proper building technique, I want to share with you the benefits of having a ramp. A ramp allows your pigs access to have a bigger cage when you can not give them anymore cage room on the floor area, that is first and foremost. It is great excersize and so fun to watch them after they master the "expressway". It allows your cage to remain cleaner longer if you use your upstairs as a kitchen area and is easy to feed and water them seeing it is at the very top of the cage. Another reason I love having a ramp and second level is it allows your pigs space, room to just get away from one another and spread everything out, therefore relieving stress and in my opinion the pigs tend to get less snippy with one another. As you can clearly see, there are so many positives ---the only negative---you have to put it together
Onto the building aspect . . .step one and very important when you add a second level of any kind to your cage, no matter the size please use cable ties and the connectors to make your cage as stable as possible. Once you have your floorplan built to you liking here is how you build your ramp to allow as much floor room as possible and have it very stable.
Using wirecutters you want to cut a fairly large hole to allow pigs to pass and come through the opening of the floor with ease. I prefer to cut 5 grids across by 7 grids down. Make sure you cut them totally off and even so your pet does not have get injured from the sharp edges. Than file down the edges til smooth. This is what the opening for the ramp should look like . . .
Now that you have the opening complete you need to cut the coroplast to fit. This is the biggest challenge, but quite easy if you take the time to measure. It is easiest if you lay on your back and get under the second floor of the cage. Taking a ,mark off from the bottom the part of the coroplast that is covering your hole. You want to score the corplast down the middle, using the part you are cutting to make a edge on the front side of the opening of the ramp so you pigs knows to use the backside. Once you have that cut and scored you will fold it back to two sides of the ramp opening and secure it with packing tape. This is what the opening now will look like . . .
The next step is making your actual ramp. You are going to need a piece of 6mm coroplast with the lines of the coroplast facing across, not down the length of the ramp.This piece you are going to want to cut 21 inches long, 9 inches across. Once you have that cut out you are than going to score the piece 1 1/2 in on each of the sides to make the side walls of the ramp so your pigs stay safe from falling off. Than just angle cut all four corners of the ramp so there is a smooth edge like shown so your pig does not get injured from any sharp corners.
The next step is adding the eyelet screws. You are going to need two eyelet screws and you simply push them through the coroplast, one on each side with the hooks facing downward so they can clip onto the grid. It should look like this . . .
I prefer to use outdoor rug and cut it to fit the down part of the ramp (not the sides) and attach that to the ramp so your pig does not slide on the coroplast. Once the rug is attached you can than clip your ramp onto the grid opening and it should look like this . . .
Last edited by a moderator: